
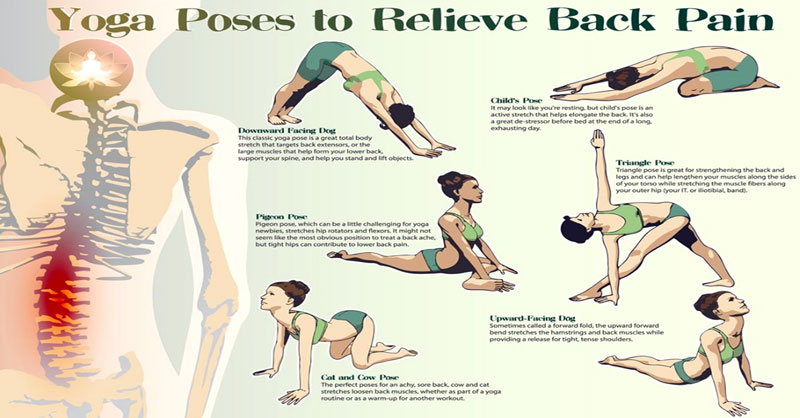
What if I told you that you only need eight minutes in your day to relieve back pain with yoga and this will not only improve your posture, but those eight minutes can improve your overall health.
Stretching doesn’t look so bad after all, besides what are eight minutes compared to permanent health benefits and relieved back pain.
Yoga is beneficial for our physical and mental state. It keeps your body in shape and it will also relax you and free your mind and spirit. Many people are replacing regular gym sessions with evening yoga exercising, because your whole body will benefit from it, not only your muscles.
If you are one of those people, whose jobs are only and strictly connected with sitting in front of a computer, then you’ve probably have had back pain and stiffness in your whole body. This is perfectly normal because you aren’t doing anything active, however if you aren’t doing anything extra to move those muscles, many complications can occur as a result to your in activeness including, tight hips and therefore problems with immobility and back pain.
Yoga will help you get rid of muscle problems and all you need to do is find a yoga mat, have a positive approach and take several minutes of your time.
Below are 8 yoga poses to rid back pain and muscle stiffness.
1. Happy Baby Pose
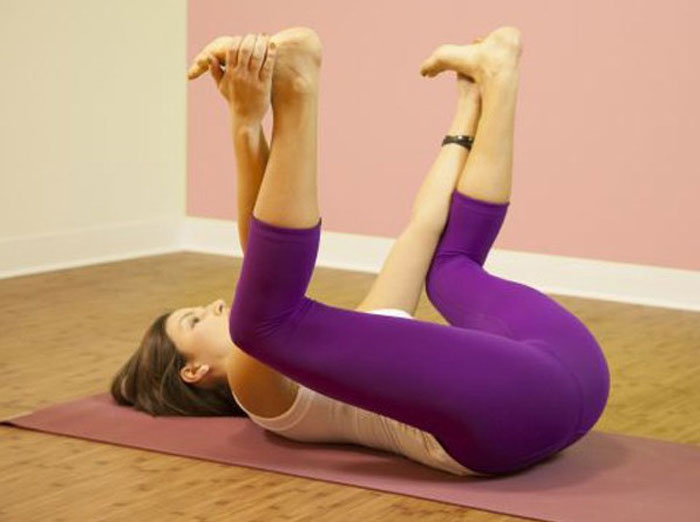
This pose is extremely easy to do and very useful.
- Lay on the yoga mat and press you back on the mat as much as possible.
- Pull your knees as far as your chest and put your hands on the inside arches of the feet.
- Try to open the knees as much as you can (maybe more than your shoulder width).
- Press the feet into hands and pull down on feet in order to create resistance.
- Stay in this pose for more than 30 seconds and try to concentrate on the deep breathing.
2. Thread the Needle Pose
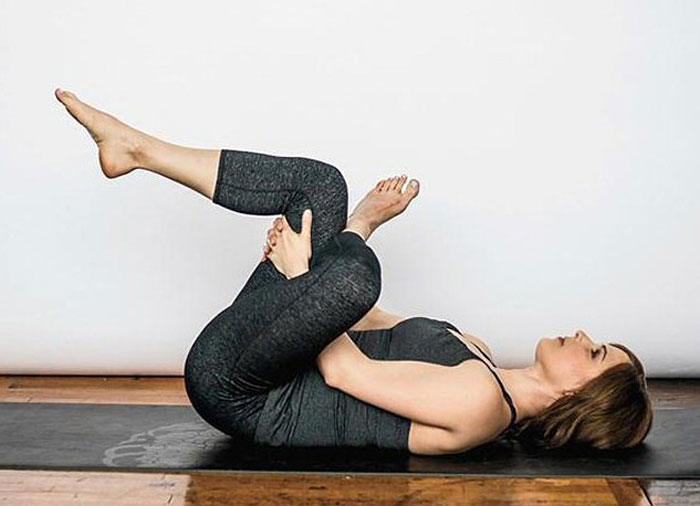
With this you will need to:
- Press your back on the mat, bend your knees and feet flat on the mat.
- Cross the right ankle over the left knee, keep the hips on the ground.
- Start pulling your left knee towards the chest by threading your right hand between the legs.
- Put your hands underneath your left knee and pull it as much as you can, keeping your right knee as open as you can in order to really stretch the hip.
- Stay in this pose for more than 30 seconds on each side and try to concentrate on the deep breathing.
3. Frog pose
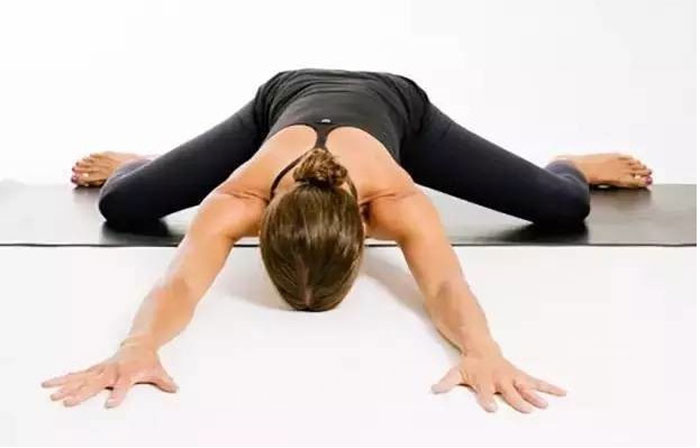
Make sure you are comfortable as this is an intense exercise.
- Place your hands flat on the mat as well as knees, or get on all fours.
- Start opening your knees as much as you can or until you feel well stretched in your inner thighs.
- Keep your hands in line with the shoulders and ankles in line with the knees.
- Keep the feet and calves grounded.
- Try to lower the forearms down and stay in this pose for more than 30 seconds and try to concentrate on the deep breathing.
4. Butterfly Pose

This is a very relaxing pose and is easily done.
- Sit on the mat with knees bent and hands placed on the mat next to you.
- The soles of your feet should be together and the knees opened to the side.
- Open the knees as near as the floor by using the leg muscles.
- You will feel the stretch in your inner thighs and if you like to intensify the feeling, bring the feet closer to you or walk your hands out in front of you.
- Stay in this pose for more than 30 seconds and try to concentrate on the deep breathing.
5. Low Lunge
For this pose.
- Place your foot forward (or start in a runner’s lunge) with hands flat on the mat, on both sides of the front foot.
- Lower the back knee and start to lift the chest, whereas the hands are placed on the front thigh.
- Intensify the stretch by placing the arms overhead and slightly lean forward.
- Be careful not to arch the lower back and stay in this pose for more than 30 seconds on each side and try to concentrate on the deep breathing.
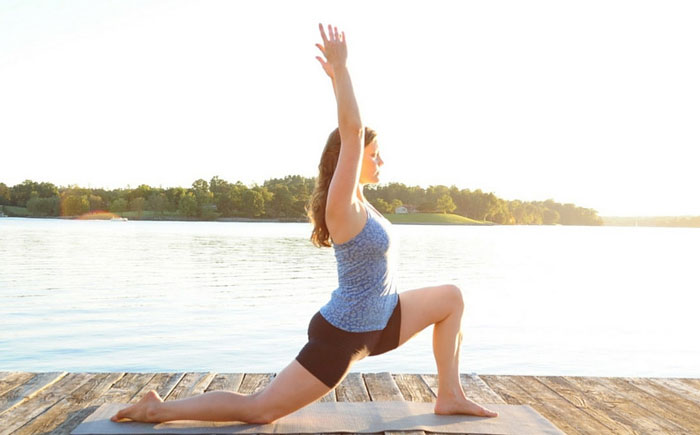
6. Crescent Lunge
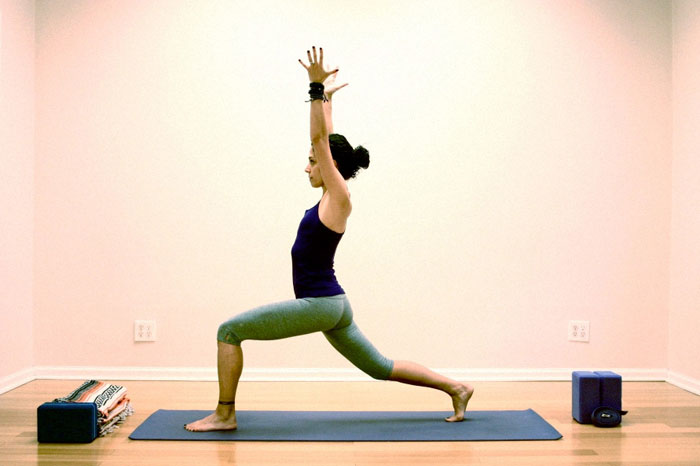
This pose is excellent for balance and stretching.
- Place your right foot forward again (runner’s lunge), however your knee should be raised this time, not grounded.
- Gently put your hands on the front thigh.
- The hips should lower while you square them to the front of the mat.
- Place the arms over the head. Intensify the stretch by lengthening the back leg.
- Stay in this pose for more than 30 seconds on each side and try to concentrate on the deep breathing.
7. Half Pigeon Pose
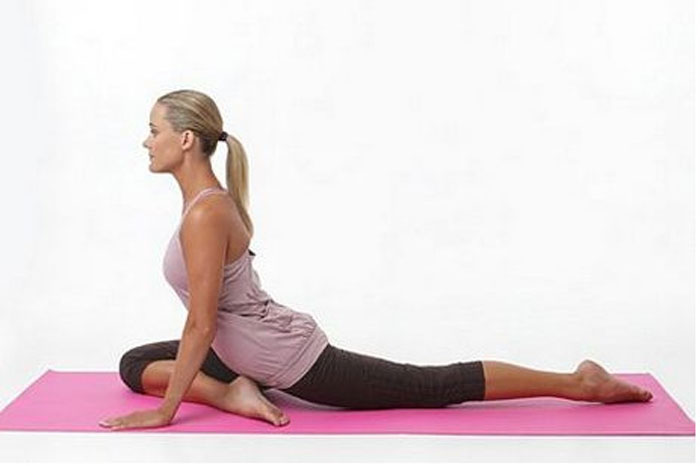
Start this pose the same as the Low Lunge.
- Right foot forward and hands placed on the mat.
- Put your right foot towards the left hand while lowering the knee over the right hand.
- The outside of the right calf is placed on the mat parallel to the front. Lower the back knee, bringing the shin to the floor.
- Place the arms straight and the hands flat on the mat.
- Intensify the stretch by lowering down to the forearms or even more, lay over the front leg.
- Stay in this pose for more than 30 seconds on each side and try to concentrate on the deep breathing.
8. Double Pigeon Pose
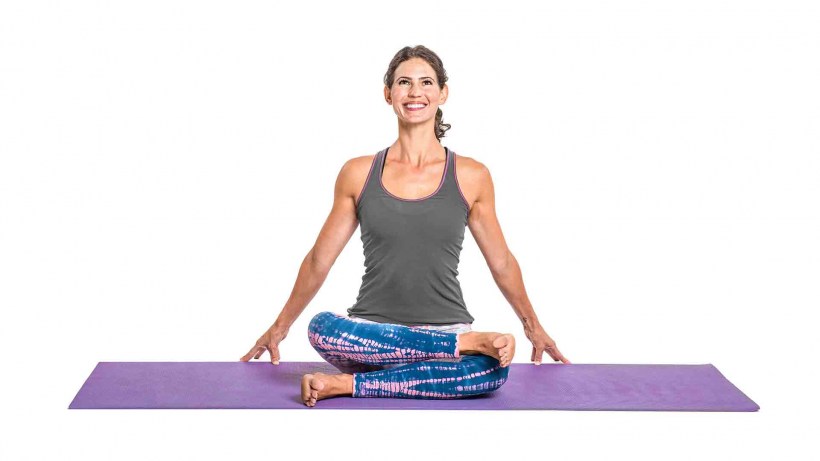
The final pose that will assist you to feel comfort.
- Sit on the mat with legs crossed, left leg in front.
- Use your hands to grab the left ankle and place it over the right knee, by gently pulling the ankle.
- The shins are stacked with the left leg on top.
- It’s ok if the right knee gets lifted, as the hips open, so will the knee lower.
- Intensify the stretch by walking your hands slightly forward.
- Stay in this pose for more than 30 seconds on each side and try to concentrate on the deep breathing.

Post your comment